Treezy comes in two separate zip files. One includes the addon, while the other contains the Treezy library, comprising models, textures, materials and node groups.
You have the flexibility to extract the library to a location of your preference. However, it’s crucial to direct the addon to the specific location where you’ve placed it.
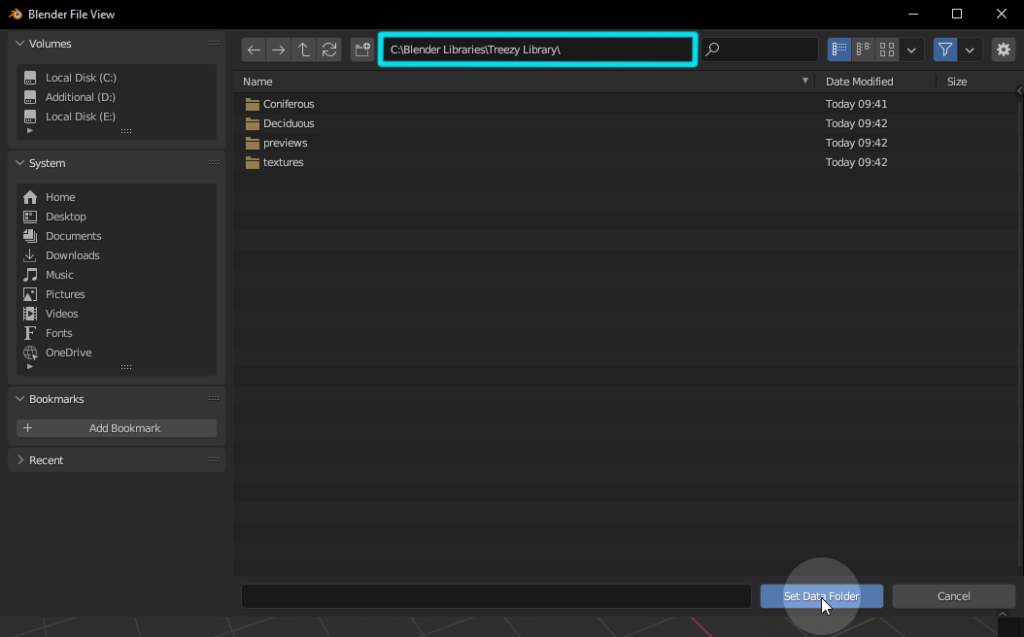
Let’s start by extracting the content of the library zip file in the desired directory. In this guide we will put it in C:\Blender Libraries.
Now let’s install the Treezy addon. Simply drag and drop the addon zip file in Blender and click Ok when prompted.
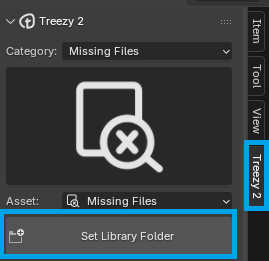
With the addon installed and enabled, the Treezy panel will appear in the side panel of the 3D view (shortcut N). However, it is not yet functional, and you must set the library directory for it to work properly. Click on Set Library Folder to proceed.
Navigate to the directory where you extracted the Treezy library (make sure the path includes the library folder itself) and click on Set Data Folder.
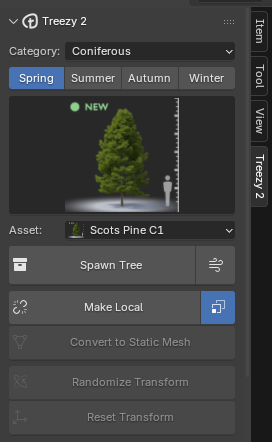
If the library was detected successfully, you should now see and be able to select trees in the addon catalog.
Alternatively, you can also set the library path in the addon preferences.